

| Mike Eden - teachers |
| You can include ArtisanCam in your teaching in a number of ways, from classroom activities guided by the classroom workshop video clips to research using timelapse, techniques, influences or questions sections or using the interactive online learning tools. Featured artists usually have seven sections and the table below will tell you what you should expect to see: |
 |
| general |
Through using the site, and being encouraged to discuss, reflect on and modify the work they produce, pupils will know, do or understand the following:
|
| cross curricular |
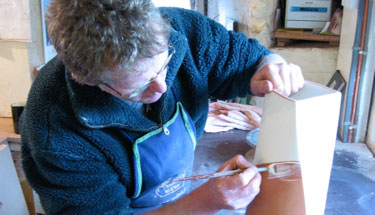
| Mike creates colourful ceramics. Science KS 2 Changing materials. Design Technology KS 2 Evaluating processes and products. |
| timelapse |
| The two ceramic vases took about five weeks to complete using terracotta clay and slip decoration. This includes approximately ten days when the clay will be drying out prior to firing. All of this was captured in a timelapse video.
 |
| techniques |
| Mike demonstrates techniques used in the production of the two vases and his work in general. |
| influences |
| Mike chose to visit The Bowes Museum in County Durham and look at their extensive ceramics collection. To find out more about The Bowes Museum why not go to www.bowesmuseum.org.uk 
 |
| classroom workshops |
The clay coil workshop uses the following materials:
The workshop uses the following tools:
You may also find these things useful:
Tips
|
| questions |
| Within the Questions section of the site there are three types of questions, those asked by us, those that have come from children via the live video conference links with the artist, and questions submitted via the submit button. |
| gallery |
| A selection of the artist's previous works. |
| other interesting sites (relating to this terms activity) |
National Society for Education in Art and Design www.nsead.org An online resource for educational specialists, resources and support www.educationalists.co.uk Gateway to over 3,000 UK Museums, Galleries and Heritage Attractions www.24hourmuseum.org.uk |
| activity - Slip Decorator |
| Slipdecorator allows the user to make a virtual decorated plate and fire it in a virtual kiln. The virtual tools are based on tools in Potter Mike Eden's studio. |